

Expert Guide to Temporary Roof Leak Repair with a Tarp
- February 5, 2025
- Read Time: 11 min
When facing roof leaks that require immediate attention, a tarp can provide a quick and effective temporary solution to protect your home from further damage. This detailed guide, backed by the extensive experience of Summit Exteriors in Coeur d'Alene, ID, provides step-by-step instructions on how to securely install a tarp on your roof. Properly applying a tarp can bridge the gap until professional repairs are made, safeguarding your home against the elements.
Step 1: Assessing the Damage
Before proceeding with a tarp installation, it's crucial to accurately assess the extent of the damage. This involves examining the roof both internally and externally:
Internal Inspection: Check the attic or the highest point inside your home for any signs of water penetration, such as stains or mold on the underside of the roof decking.External Inspection: Visually inspect your roof for damaged or missing shingles, areas with noticeable pooling, or other visible signs of structural damage.
Step 2: Choosing the Right Tarp
Selecting an appropriate tarp is vital to cover the damaged area effectively. Consider the following features when choosing a tarp:
Size: Ensure the tarp extends at least 3-4 feet beyond the damaged area on all sides to provide adequate coverage.Material: Opt for a heavy-duty, waterproof material such as polyethylene or reinforced canvas to withstand weather conditions.
Durability: The tarp should be tear-resistant and equipped with rust-resistant grommets for securing it to the roof.
Step 3: Gathering Necessary Tools and Materials
Having the right tools at hand before you begin is essential for a smooth installation process. You will need:
Sturdy Ladder: To safely access your roof.Rope or Bungee Cords: For securing the tarp edges.
Hammer and Nails or Tarp Clips: To anchor the tarp to the roof.
Utility Knife: For trimming the tarp to size, if necessary.
Protective Gloves and Safety Gear: To ensure your safety during the installation.
Step 4: Preparing the Roof
Proper preparation of the roof surface is crucial for the effective placement of the tarp and can prevent further damage during installation:
Clean the Roof: Remove any debris, such as leaves, twigs, or broken shingles, that could puncture the tarp or impede water drainage.Dry the Area: If possible, dry the affected area to improve adhesion if you are using any sealants or adhesive hooks for the tarp.
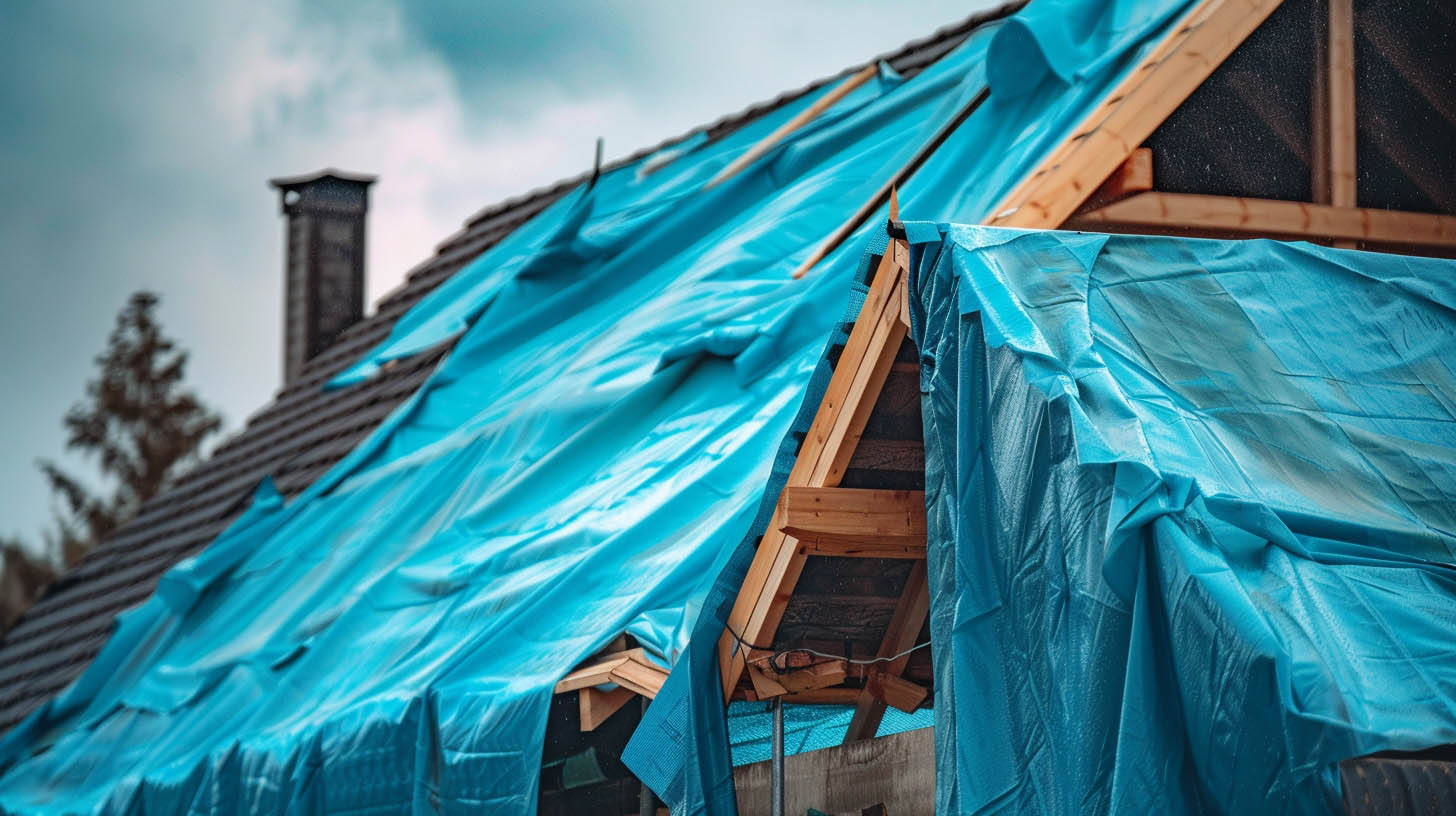
Step 5: Installing the Tarp
Positioning the Tarp: Unfold the tarp and spread it over the affected area, ensuring that it lies flat and extends beyond the damaged section.Securing the Edges: Start at one end and secure the tarp's edges using ropes or bungee cords tied to stable elements on the roof or the eaves.
Anchoring: Use nails or tarp clips along the edges of the tarp, spacing them about every two feet to prevent wind from lifting the tarp.
Step 6: Double-Checking the Installation
Once the tarp is secured, it’s important to double-check the installation:
Inspect the Tarp: Ensure there are no loose areas that could catch wind. Adjust the ropes or add more anchors if necessary.Check for Pooled Water: After the next rain, check for any pooling on the tarp, which indicates sagging or insufficient slope. Adjust as needed to ensure proper drainage.
Step 7: Contacting a Professional
While a tarp is an excellent short-term solution, it is not a substitute for professional repairs. Contact a reputable roofing contractor, such as Summit Exteriors, to assess the damage and perform necessary repairs. As an Owens Corning Preferred Contractor, Summit Exteriors provides expert services that ensure long-term solutions to roofing problems.
Conclusion
Installing a tarp is a crucial skill for homeowners to manage roof leaks temporarily and prevent further interior and structural damage. Following these steps will help maintain the integrity of your home in adverse weather conditions until professional repairs can be made. Remember, timely intervention and professional assessment are key to maintaining a safe and secure roofing system.
